Boating and fishing trends have changed considerably in the decades since our little Stabicraft armour plated hero was crafted. Fisho’s now demand highly refined layouts to match their style, tackle, electronics and accessories. Hence our wish list for the little Stabi 490 was formulated after a good round of brainstorming with Barry and Brendan at the Ozsea Boats factory in Seaford, Victoria.
If you remember where we left off last issue, the hull was completely sand blasted, revealing cracks, craters and crevices, as well as removing the oxidation around the corrosion and the original paint. We found that damage wasn’t too widespread, and with the hull completely stripped, we could truly get some indication of its condition. Ozsea’s Brendan Tilders said, “If you don’t do it all properly from the start by bringing it all back to a clean surface, you are totally wasting your time!”
Our wish list on the hull included:
* Repairing all corrosion to start with a fresh, clean hull
* Removing the weak and ugly old windscreen and replacing with a tough wavebreaker
* Reworking the cabin storage to something more practical, improving storage, but still allowing bow access through the hatch
* Remodelling the seat supports
* Eliminating the portable fuel tank and fitting a permanent aluminium replacement with deck fill
* Replacing all of the rod holders and fittings
* Replacing the bait board and cutting table
* Remodelling the anchor well for new Lone Star drum winch and bow sprit
* Remodelling the gunwale
* Fitting a new rear ladder
* Fitting new transducer brackets
* Painting with non-reactive surface suitable for a wrap
Thankfully, the amount of corrosion was minimal and mainly centered around non-conducive metals where bolts, screws and fixings had come in contact with each other without suitable sealant. These small pitted areas were quite easy to repair with the MIG welder, as the plate alloy construction is thicker than the lighter pressed aluminium boats, enabling the welder to get some real penetration without burning through thin sheets.
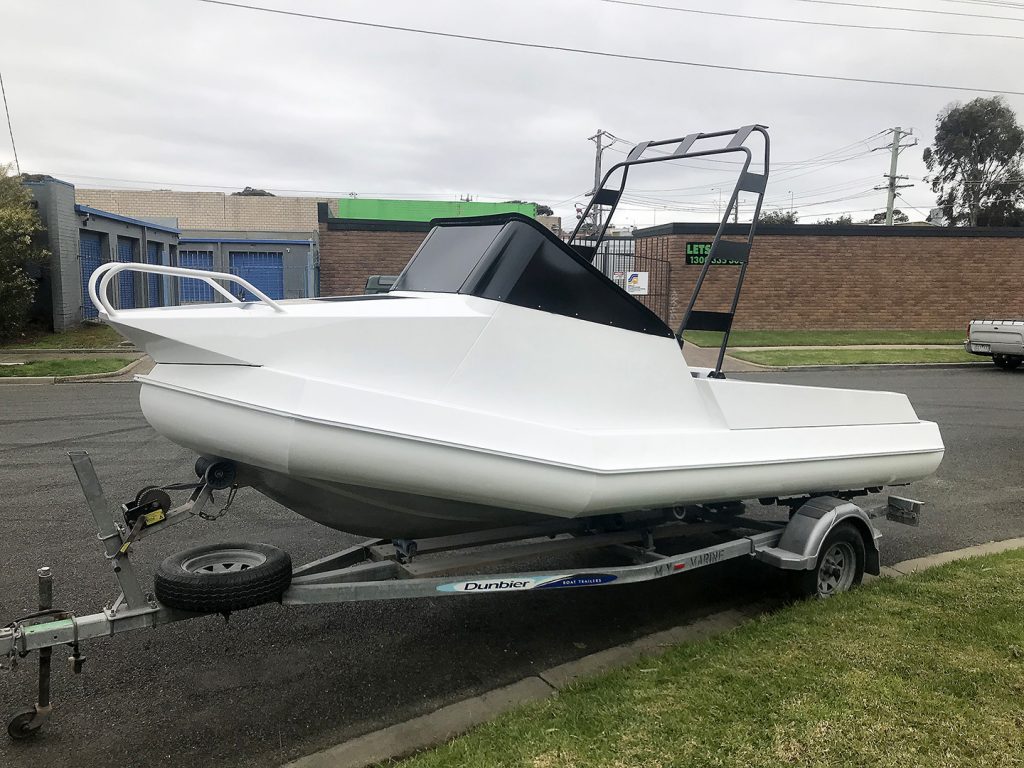
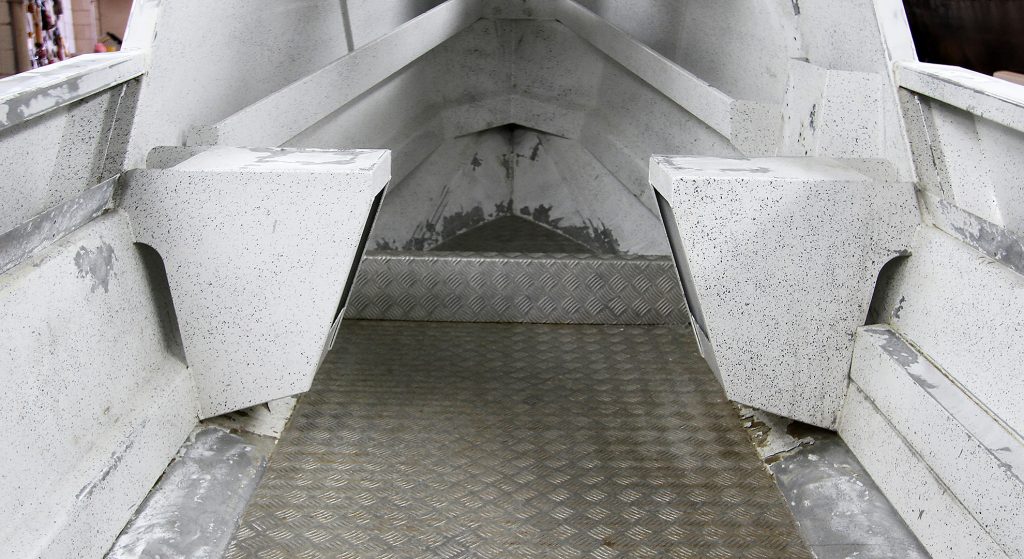
We have seen incredible popularity in replacing old and often daggy and crazed windscreens with solid wavebreakers to improve protection. And it’s hard to imagine a daggier windscreen than the original on the Stabicraft. Hence, the Ozsea boys set about forming a new alloy wavebreaker that not only gives improved protection to the driver and passenger, it’s a solid shell, should we take a big breaker crossing a bar, and makes the dashboard space below more protected for mounting electronics.
The original cabin was a disaster. It had a single plywood sheet covering a shallow cavity that went full width and length to the bow. Not only was the storage height underneath impractical, it was impossible to get into with other items on top. Any boxes and bags up top were not well retained and would go flying around in choppy or rough conditions. We removed the plywood entirely, leaving the raised alloy retainer and forming a workable space to fit a large twin door Icey Tek icebox. In our opinion you simply can’t go to sea without a good icebox, and they definitely don’t get any better than Icey Tek. They keep ice cold for days on end, even in blistering heat, and serve to keep the bait, food and refreshments cool. The Icey Tek also doubles up as a kill tank for your catch. You simply shouldn’t kill a fish for the table if you’re not going to treat it well from the time of capture by dispatching it quickly without stress and cooling the flesh ASAP.
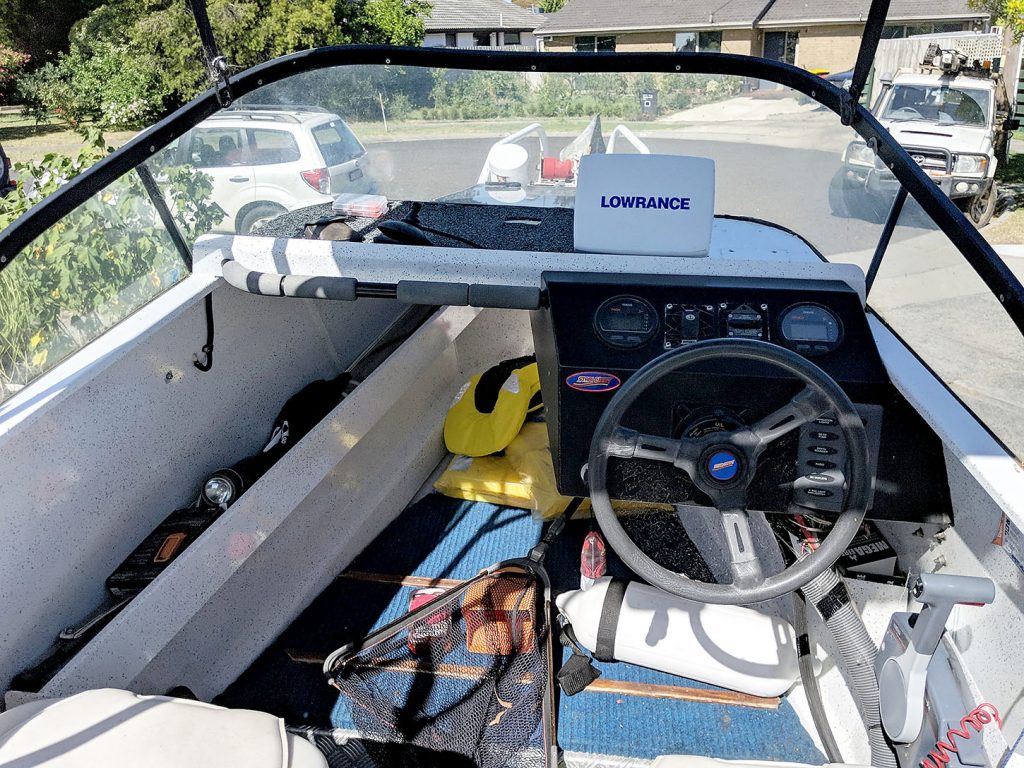

The twin doors on this sturdy, insulated polyethylene icebox make access from either side a breeze, and its tough construction means it can be dragged in and out of the boat easily, doubling up for other adventures. There’s plenty of storage room left up in the bow for tackle bags and the like, and we suspect we may end up permanently mounting a second battery box up front dedicated to the winch and accessories; but more on the electricals to come. We can still get through the large cabin hatch if we need to, but with a new Lone Star winch planned for the bow, chances are we won’t ever have to use it.
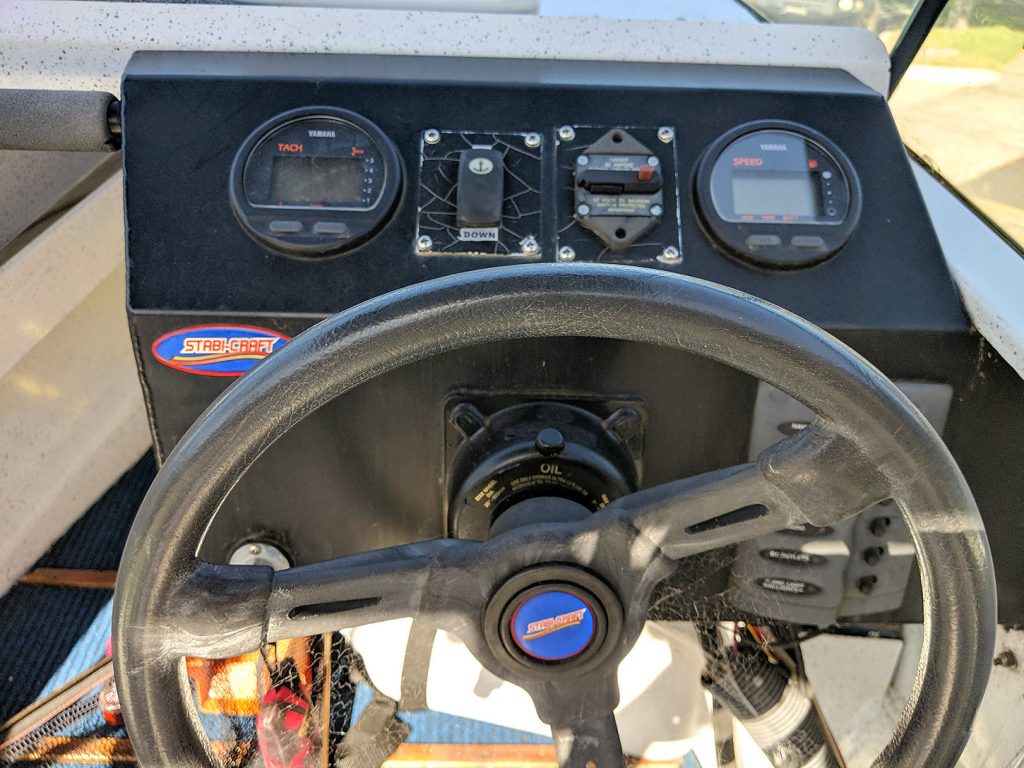
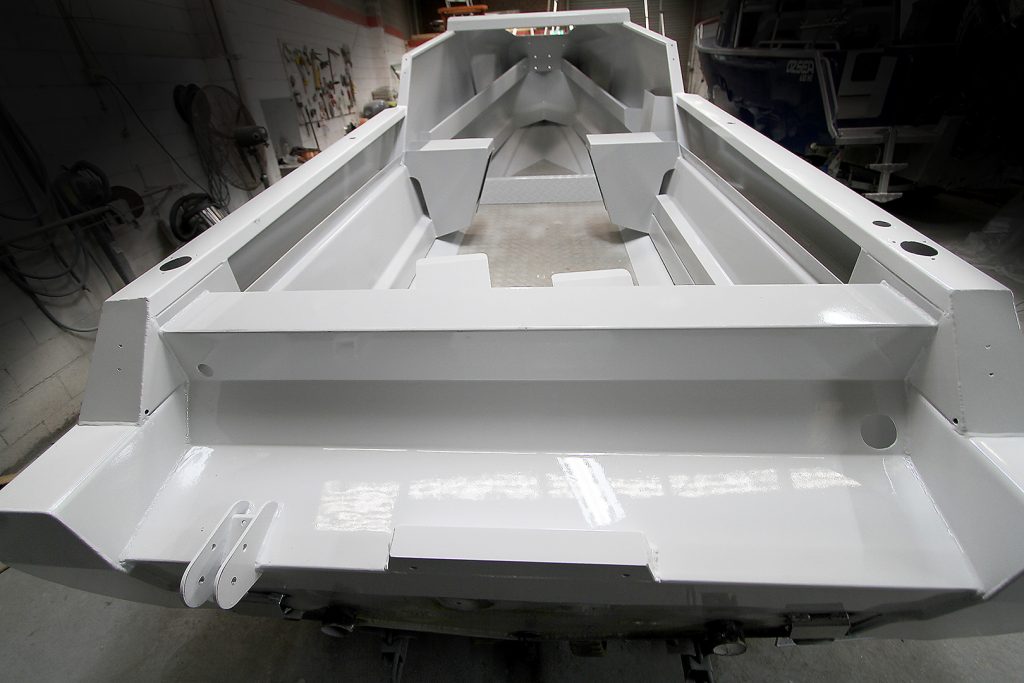
The driver and passenger seat supports were another item of contention. They were certainly very strong, but had limited storage capability. Our brainstorming session developed a pair of hinged hoppers that now provide ideal, protected storage for flares, torch, tackle and assorted nick knacks that we fisho’s like to gather. We have also decided that, due to the limited size of the boat, we are not going to fit bulky upholstered seats. Instead, we are simply fitting padded cushions to the tops of the seat boxes. They can be made detachable for cleaning and dry storage, reducing wear and the risk of a wet bum after rain and dew. This is certainly a stand-up style of boat to drive anyhow, particularly now with the solid wavebeaker.
The original transom layout was a disaster. It had portable fuel tanks drifting around, with an open battery and bilge wiring everywhere. We decided an aluminium custom made fuel tank would neaten the entire area, be much safer, more practical and wouldn’t intrude into the deck area. The Ozsea boys not only built a ripper alloy fuel tank, it now has deck fill and breathers outside the hull into the transom. It’s around 50 litres in capacity, giving terrific range with the thrifty little 60HP Yamaha 4-stroke. For really long sojourns we can still carry a portable fuel tank in the bow. You simply can’t have a fixed fuel tank without a decent water-separating fuel filter either.
We made sure that the fuel tank was mounted on a raised platform for a number of reasons. Firstly, this is a self-draining boat so we maintained unobstructed deck flow right through to the scuppers. It also allows easy washing and cleaning of the whole area, reducing the opportunity for rubbish to gather causing corrosion.
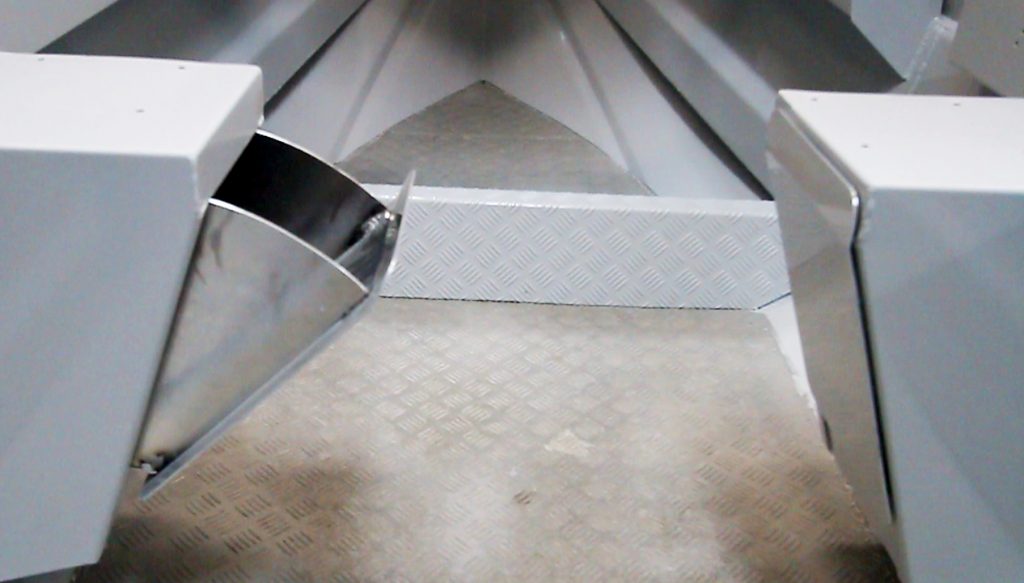
The battery now has a suitable platform for secure mounting in an enclosed box, and there is still room for a large bilge pump and float switch, plus the excess wiring has been neatened considerably. Out back, the function of the craft has been lifted dramatically with a fold-down ladder for easy boarding, both on and off the water. The Ozsea boys even welded on a pair of transducer brackets covering the old corroded mounting holes, which this means there will be no screws piercing the transom except the engine mounting bolts.
You just can’t have a serious fishing boat without a good cutting board, and the Ozsea boys have manufactured us a ripper unit. It is actually modelled a bit off the modern combination unit that Stabicraft now incorporates into their “Game Chaser” transom layout, with the bait board and rod holders on top and a fully plumbed live bait tank beneath, complete with viewing window. It hasn’t been properly located as yet until we refit the engine to allow for full engine tilt.
We checked the engineering clearances for a new Lone Star electric anchor winch and made sure we could refit the rod holders and select fittings. Then it was off to the spray shop, where cleanliness is next to Godliness!
The entire rig was vacuumed, air hosed and thoroughly degreased with Ali Brite (an acidic wash), ensuring complete cleanliness. Any paint left in crevices, welds or similar must be removed, as the residual acid will cause a reaction in the future. You must ensure that that the entire boat is thoroughly rinsed after the acid wash and avoid any contact with any other surface, including glass. Strict safety and drainage precautions and full protective equipment must be utilised.
Once the boys were sure of the cleanliness of the entire rig, it was time for the spray job that, of course, begins with a 2-pack epoxy primer, in this case from PPG. The checker plate floor and hull beneath the chines were to remain unpainted, and hence they were masked and covered to avoid overspray. It is vital to use alloy-compatible paint or it will create a huge amount of corrosion. I have actually seen hulls destroyed from using the old paints with lead, chrome and high nickel contents, although there are not many of our current paints that still use such components.
The Ozsea boys spray two coats of epoxy primer, rubbing back between the two applications, forming a filler for any minor imperfections. Once satisfied with the prepared and primed surfaces, they use and recommend PPG 625 2-pack polyurethane sprayed lightly, with many coats to final finish. Ozsea’s Barry said, “Just be patient and use many light coats to slowly build the final finish. Leave enough drying time between the coats to become tacky so as to attain a high build and smooth finish without runs.”
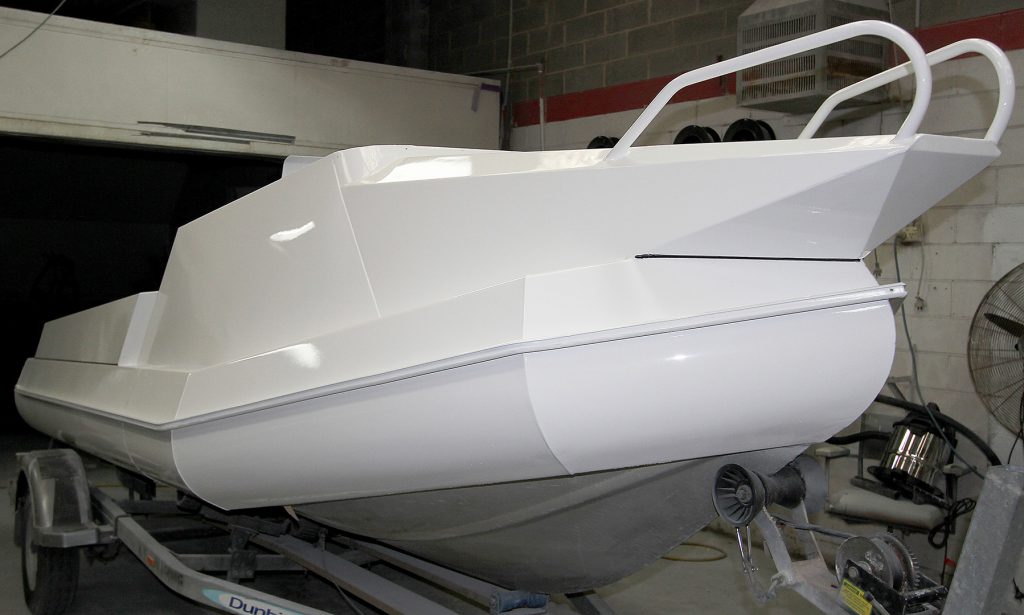
We only did a basic white spray job, as we will be applying a custom wrap from our friends at Signarama. However, it does have some black trims for the rocket launcher, dash and wavebreaker. Once she cured, it was time to load her back on the trailer and head over to my place for the engine, hatch and component refit!
The new componentry, modifications and spray job have turned “Butt Ugly” into “Awesome”, thanks to the engineering prowess, patience and imagination from Barry and Brendan at Ozsea! Thanks fella’s, and now it’s off to the next exciting stage.
Stay tuned for the progress, along with more hints and video’s along the way. Then we’ll take it fishing!